


How to Join Artificial Turf Strips to Hide Seams
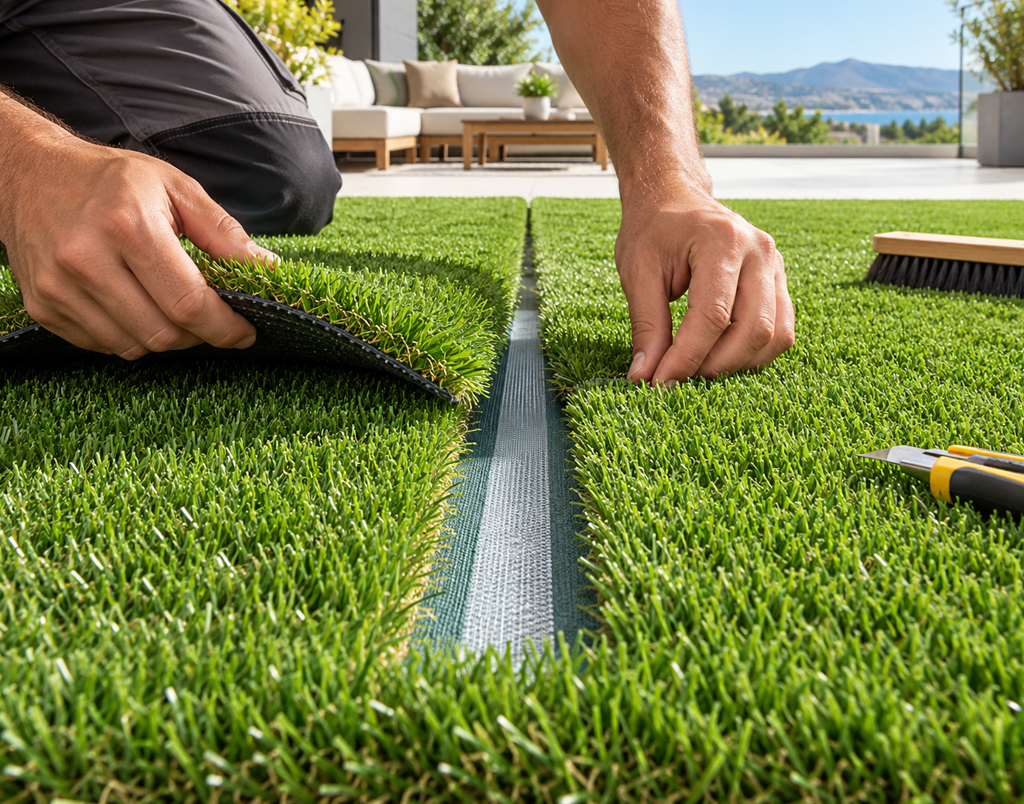
A good seam looks natural and is barely noticeable.
Joining two strips of artificial turf to make them look like a single piece is not difficult, but you need to pay attention to several details before gluing. The direction of the fibers, the spacing between the edges, and the placement of the seaming tape will determine the result.
Therefore, it’s advisable to prepare all pieces and check how they fit before removing the protective film or applying the adhesive. Correcting the position at that moment is much easier than doing so once the adhesive has been applied.
Place all strips in the same direction
Before thinking about the seams, pay attention to which way the turf fibers lean. When you unroll a piece, they usually lie slightly flattened towards one end of the roll.
All strips must follow that same direction. That is, if the fibers of one piece point towards your home, those of the adjacent piece must also point towards it.
Our advice is simple: lay out all the strips before cutting or gluing anything and view them from the point where you will normally see the garden or terrace.
If any piece is rotated, you’ll notice it immediately because it will appear to be a different shade. In reality, the turf hasn’t changed color; rather, the light reflects differently when the fibers are oriented in the opposite direction.
What Gap to Leave Between Artificial Turf Strips
Check that the edges are well trimmed before positioning the pieces. If you still need to prepare them, our article on how to cut artificial turf explains how to do it without damaging the fiber rows.
Next, bring the two strips together without gluing them and leave a gap of 3 to 5 mm. Maintain this uniform distance along the entire seam.
If you join the pieces too closely, the fibers will pile up and the seam will look bulky. If you leave more space than necessary, a line without turf will appear between them.
This preliminary step is well worth it.
Afterward, run your hand along the seam from start to finish and check that no area is raised, sunken, or more separated than the rest. A few minutes of review now will save you from having to peel off and reposition later.
How to Place the Seaming Tape
Fold the edges of the two pieces back and place the tape directly under the seam. It should be centered to hold the same surface area of turf on each side.
If you use a 10-meter adhesive seaming tape, remove the protective film little by little as you lower the strips. This way, you’ll maintain control of the position and prevent the turf from sticking prematurely.
You can also work with non-adhesive tape and specific glue. In that case, spread the product evenly: applying more adhesive does not guarantee a better bond and makes the job considerably more difficult.
If you’re unsure which system suits your installation, consult our guide on what you need to install artificial turf. There, we explain which accessories correspond to an installation on soil or pavement.
Don’t Bury the Fibers When Gluing
This is one of those small mistakes that become very noticeable later.
As you lower the edges onto the tape, separate the fibers with your fingers so they don’t get trapped under the turf’s base. Work slowly and check each section before continuing.
If several fibers get stuck, the seam will show a more pronounced line. Keeping them out of the adhesive allows them to be lifted and mixed with those of the adjacent piece during brushing.
Press both sides evenly and recheck the spacing. The pieces should be facing each other, without overlapping and without forming gaps.
The Last Trick is in the Brush
Once the pieces are joined, run your hand over the seam to locate any unevenness or trapped fibers. If you find any, correct them before considering the job finished.
Then, brush the turf against the grain and pay special attention to that area. The goal is to lift and blend the fibers from both sides until the seam line is barely noticeable. Several firm and controlled passes work better than brushing quickly without checking the result.
If you are preparing the installation from scratch, in our section on accessories for installing artificial turf you will find tapes, adhesives, cutters, and brushes to work with the right tools without improvising with the first thing you find at home.
And if you have any questions during the installation, at Jardín Artificial we are here to help you. We like to advise our customers so they know what they need, how to use it, and which option best suits each case, so you can consult us before, during, or after your purchase. Providing this attention is part of how we work.
