
Weed control netting: What it is used for and how to use it
Weeds never rest. And if you want peace of mind, there is one thing that cannot be missing from your outdoor project: the weed barrier.
It is not the most attractive feature, nor will it appear in your Instagram photos, but believe us: if you do not install it correctly from the start, what is a picture-perfect garden today can become chaos in a few months.
We are going to explain simply, without technicalities or complications, what a weed barrier is, why you should use it, and how to install it properly, so you can forget about weeds for a long time.
Estimated reading time: 4 minutes
Table of contents
What does a weed barrier actually do?
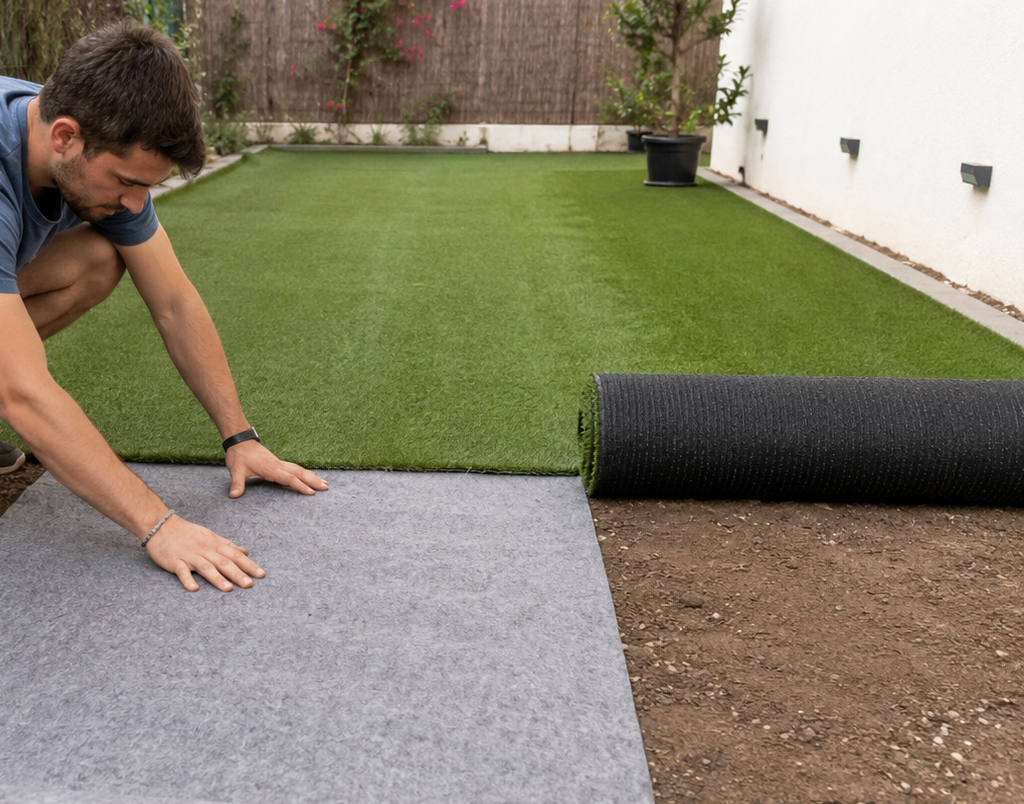
Think of it as an intelligent barrier. It is a permeable fabric placed between the ground and whatever you are going to install on top, whether it is artificial turf or decorative gravel.
Its mission is simple: to block the passage of weeds while allowing water drainage. Unlike closed plastic, this mesh allows rain to pass through and prevents puddles, but it does not allow roots or shoots to break through from below because it blocks out the sun.
In gardens with artificial turf, it prevents weeds from appearing by surprise. And in gravel or decorative areas… it is practically essential.
If you use it, you will enjoy the following benefits:
- Less maintenance
- Fewer surprises
- Greater peace of mind
When should you use it? (And when is it not necessary)
Always use it when working on soil, sand, or natural ground. It does not matter if it is a garden, a pool perimeter, a gravel path, or a ground-level terrace. In those cases, it is essential.
And when is it not? Well, if you have a consolidated hard floor, such as concrete, stone, or tiles, you do not need it. That type of surface already performs the blocking function.
If the ground is natural, a weed barrier is not optional. It is common sense.
How to install a weed barrier step by step (without complications)
There is no mystery here, but we do advise you to follow an order when laying the weed barrier:
- Prepare the ground
Remove all weeds, roots, and stones… and leave the surface level and compacted. This step is key.
- Place the mesh
Spread it out, covering the entire area well. If you use several pieces, overlap them by 5 to 10 cm to prevent gaps.
- Fix it to the ground
Use fixing staples or pegs. Do not skimp. A well-secured mesh holds up much better over time.
- Trim the edges
With scissors or a utility knife, leave everything clean and fitted.
- Install over it
You can now directly install the artificial turf, sand, or gravel, depending on what you are setting up.
Common mistakes you should avoid
Here are some mistakes we see very often:
- Using low-quality mesh: it breaks easily and does not fulfill its function.
- Not fixing it correctly: wind or the use of the garden itself can move it.
- Not overlapping the pieces: remember that weeds always find a gap to slip through.
So… is it really worth it?
Yes, very much so.
The weed barrier is a small detail that changes everything. It is economical, easy to install, and extends the life of your outdoor installation. In the case of artificial turf, it is one of those elements that goes unnoticed… until it is not there.
So, if you are serious about your project, include it from the start. Because taking care of the details from the foundation is what transforms any garden into a space you will enjoy for years.
If you need to ask us any questions, please contact us and we will help you resolve them. At www.jardinartificial.es, we love helping you with your projects and making them a reality.