How to Cut Artificial Grass for a Professional Installation: Everything You Need to Know
Installing artificial turf on a terrace, patio or garden is a perfect option to improve any indoor or outdoor space, and the customers of our online store www.jardinartificial.esknow it.
However, it is very important to do the installation well so that the final finish is professional and you feel proud of your work. In this sense, it is essential to mow the lawn correctly, both to cover the entire surface and to avoid any obstacles that may be present.
But… Courage! In Artificial Garden we help you so that, with a little preparation and the right tools, you get to make perfect cuts and achieve a uniform finish without visible joints.
With our guide, you will learn how to cut artificial grass like a pro and some tricks to get the best result, especially on obstacles such as trees, lampposts, columns or curbs.
Why is it important to make accurate cuts in an artificial turf installation?
Cuts in artificial turf must be accurate from the start. If not done correctly, you could end up with ill-fitting joints or wasted material.
A bad cut can not only be difficult to correct, but it can affect both the aesthetics and the daily use of the artificial turf. So follow our guide and listen to professional experts.
Guide to Mowing Artificial Grass Correctly
Step 1: First of all, measure the surface on which you want to install the Artificial Grass.
Before you even think about doing any mowing, carefully measure the area where you are going to install the artificial turf. This will not only allow you to calculate how much turf you need, but will also help you plan the layout of the rolls / sections. Remember that cuts in the turf should be made before gluing it to the ground, to avoid mistakes and waste.
Tip: In Artificial Grasswe can help you to calculate the exact measurements and know how much artificial synthetic grass you will need. Send us a plan of your surface and a photo, and we will tell you the size of each strip.
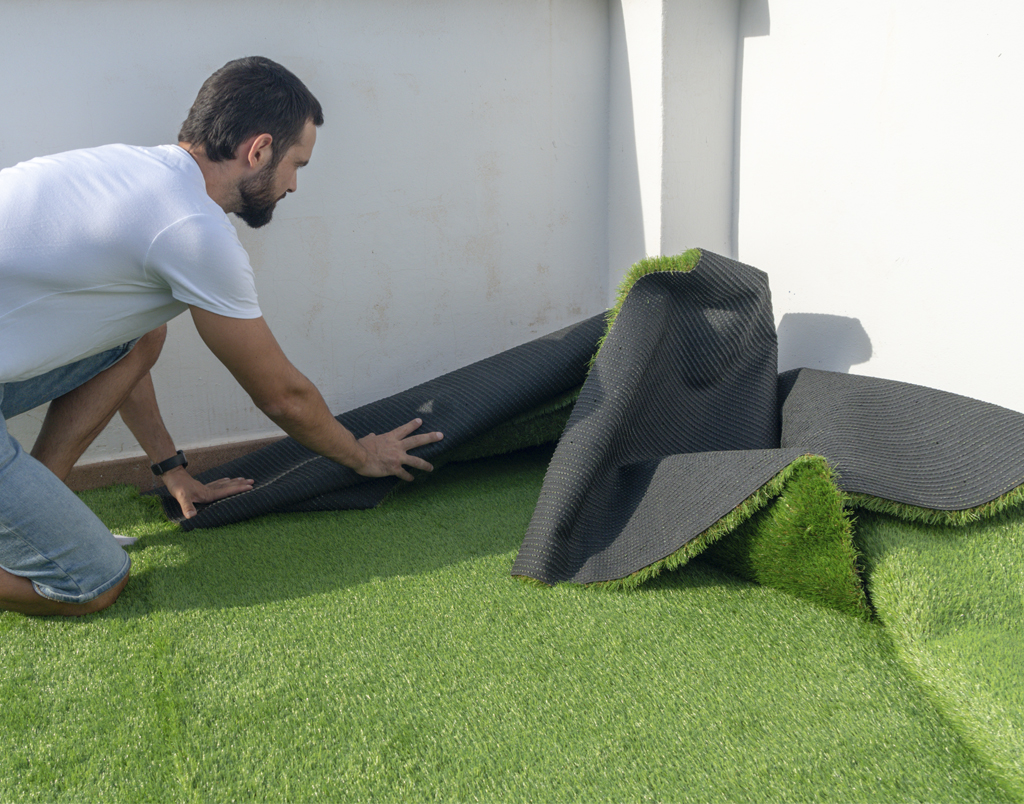
Step 2: Based on your planning, cut the artificial turf sections.
With the measurements well defined, cut the roll of artificial artificial grass into strips as planned. We recommend leaving a margin of about 20 cm at each end, as this will make it easier to make cuts later on, especially around obstacles.
Caution: For convenience, cut on the roll without unrolling it completely. This makes it easier to handle the grass and will allow you to better control the process.
Other times customers ask us for the grass already cut, not in complete rolls. If you order this way, you will simplify the process. All you need to do is add the mowing service and clearly indicate the measurements of each roll.
Step 3: Spread the Artificial Turf Rolls on the Ground or Soil
Lay the first strip of turf on the surface, following the layout you have planned. Spread it completely. Do the same with the rest of the strips.
Don’t forget that each piece of turf should have a 20 cm margin along all edges, headers and sides.
Leave the sod spread out for 1 full day. This will help it adapt to the ambient temperature and conform to the soil naturally.
Not to forget: Orient all the strips in the same direction and make sure that the fibers point in the direction from which you usually see the lawn, as this will give a more natural and uniform result.
Step 4: Mark the Trimming Areas on the Back of the Artificial Turf and Trim Following the Marks
To make cuts in specific areas where there are obstructions, such as around trees, columns or curbs, use a cutter to make marks on the back of the turf. These marks will help guide you and prevent mistakes when making cuts.
When you have to cut a strip crosswise, you must be more careful than if you cut it lengthwise because the line of the knots is not a guide. Make small incisions every 30 cm using a ruler. Make incisions of about 2-4 cm, from the inside out.
Once the incisions are made, roll the sod back up and cut following the marks made on the reverse side. When making the cuts, use a board as a support to keep the cut straight and avoid deflecting the line.
Remember to always leave a small margin around the edges for final sanitizing. Better to have too much than too little 😉.
Step 5: Sanitize Joints and Adjust Edges
Before overlapping two strips of turf, it is very important to clean up the sides or edges of the strips that will later be joined. This involves trimming the edges straight across the back, between the spaces separating the knot lines, to prevent the fibers from fraying, and to achieve a clean finish at the joints. Leave a 3-5 mm gap between the strips so that the joints are not noticeable.
When you have finished with all of them, place weight on each strip to keep them in place and then join them together.
Step 6: Cut the remaining Artificial Grass on the Perimeter
Make a final cut at the edges to remove excess to achieve a perfect fit. Use the reverse cutting technique to follow the natural line of the edge for a clean finish.
Step 7: If you have a drain, do not forget this last step.
Artificial turf drainage is a very important thing to take care of to avoid water accumulation. If you install turf over an area with drains, make a U-shaped cut to allow access to the drain without it being visible.
Where do I need to cut the Artificial Turf?
Some of the locations/obstacles where specific cuts generally need to be made are:
- Corners and curbs: For an exact, wrinkle-free fit.
- Obstacles such as trees, columns or lampposts: Make a precise cut to surround these elements so that the lawn can avoid them without difficulty.
- Drains and drains: To allow proper drainage and prevent standing water.
- Irregularly shaped pools and edges: Make careful cuts to adapt the turf to the curved or irregular shape of each surface.
Here are two explanatory videos to show you how to overcome circular obstacles such as trees, columns or lampposts:
Finishing the Installation
Correct mowing is key to ensure that the joints are perfect and the lawn looks uniform and natural.
If you need to know how to continue with the installation, we leave you two additional guides to install your artificial turf on soil y on pavement.
If you still have any questions, the professionals of the team at Artificial Garden will be happy to advise you.